
In Part 1 of this series we created our new LAB, we got the System Center 2012 Configuration Manager ISO and extracted it, then copied it to our Active Directory server. We then created the System Management container in AD, delegated permissions to the container, extended the Schema for Configuration Manager. We then opened TCP ports 1433 and 4022 for SQL replication between sites, installed some prerequisites like .NET Framework 4.0, added some features and then downloaded and installed SQL Server 2008 R2 SP1 CU6. We then configured SQL Server using SQL Server Management Studio for security and memory configurations prior to running the Configuration Manager 2012 setup to assess server readiness. Finally we installed a central administration site (CAS).
In Part 2 we setup our Primary server with SQL Server 2008 R2 SP1 CU6. We then installed Configuration Manager 2012 on our primary server (P01) and verified that it was replicating to our central administration site (CAS) server. Then we configured Discovery methods for our Hierarchy and then configure Boundaries and Boundary Groups.
In Part 3 we configured Discovery methods and configured boundaries and created a boundary group, we then configured them for Automatic Site Assignment and Content Location. In Part 4 we added the Application Catalog roles to our Hierarchy. We then configured Custom Client Device Settings and then deployed those settings to the All Systems collection on site P01. After that we created Custom Client User Settings and deployed them to the All Users collection in order to allow users to define their own User and Device affinity settings.
In Part 5 we installed the WSUS server role (it is required for the Software Update Point role). We then installed the Software Update Point role on our CAS and Primary servers and we configured the SUP to support ConfigMgr Client Agent deployment which is a recommended Best Practice method of deploying the Configuration Manager Client Agent. Now we will prepare our server for the Endpoint Protection Point role, and install that role before configuring custom client device settings and custom antimalware policies. We will then deploy those custom client device settings and custom antimalware policies to our newly created Endpoint Protection collections.
Tip: This is a long post and it will take you some time to complete, please give yourself a few hours to go through it all.
Below is an Introduction to Endpoint Protection in Configuration Manager, for more info see the following on Technet – http://technet.micro…y/hh508781.aspx
When you use Endpoint Protectionwith Configuration Manager, you benefit from the following:
- You can configure antimalware policies and Windows Firewall settings to selected groups of computers, by using custom antimalware policies and client settings.
- You can use Configuration Manager software updates to download the latest antimalware definition files to keep client computers up-to-date.
- You can send email notifications, use in-console monitoring, and view reports to keep administrative users informed when malware is detected on client computers.
Endpoint Protection installs its own client, which is in addition to the Configuration Manager client. The Endpoint Protection clienthas the following capabilities:
- Malware and Spyware detection and remediation.
- Rootkit detection and remediation.
- Critical vulnerability assessment and automatic definition and engine updates.
- Integrated Windows Firewall management.
- Network vulnerability detection via Network Inspection System.
Recommended Reading:
Introduction to Endpoint Protection in Configuration Manager – http://technet.micro…y/hh508781.aspx
Planning for Endpoint Protection in Configuration Manager – http://technet.micro…y/hh508763.aspx
Configuring Endpoint Protection in Configuration Manager – http://technet.micro…y/hh508764.aspx
Prerequisites for Endpoint Protection in Configuration Manager – http://technet.micro…y/hh508780.aspx
Best Practices for Endpoint Protection in Configuration Manager – http://technet.micro…y/hh508771.aspx
Administrator Workflow for Endpoint Protection in Configuration Manager – http://technet.micro…y/hh526775.aspx
Tip: Chapter 16 of the recently released book entitled System Center 2012 Configuration Manager Unleashed by SAMS publishing covers Endpoint Protection in much greater detail than this post, I’d highly recommend you read it, and of course I have to mention that as I wrote it ! 🙂
Step 1. Prepare our Hierarchy by creating Endpoint Protection Folders.
Note: Perform the following on the CAS server as SMSadmin
In order to make management of our Endpoint Protection devices easier we will create some new Folders. This will facilitate targeting unique custom Antimalware policies and custom client settings to target different types of computers, for example you may want to target different File and Process exclusions to your SQL servers as compared to your Hyper-V host servers.
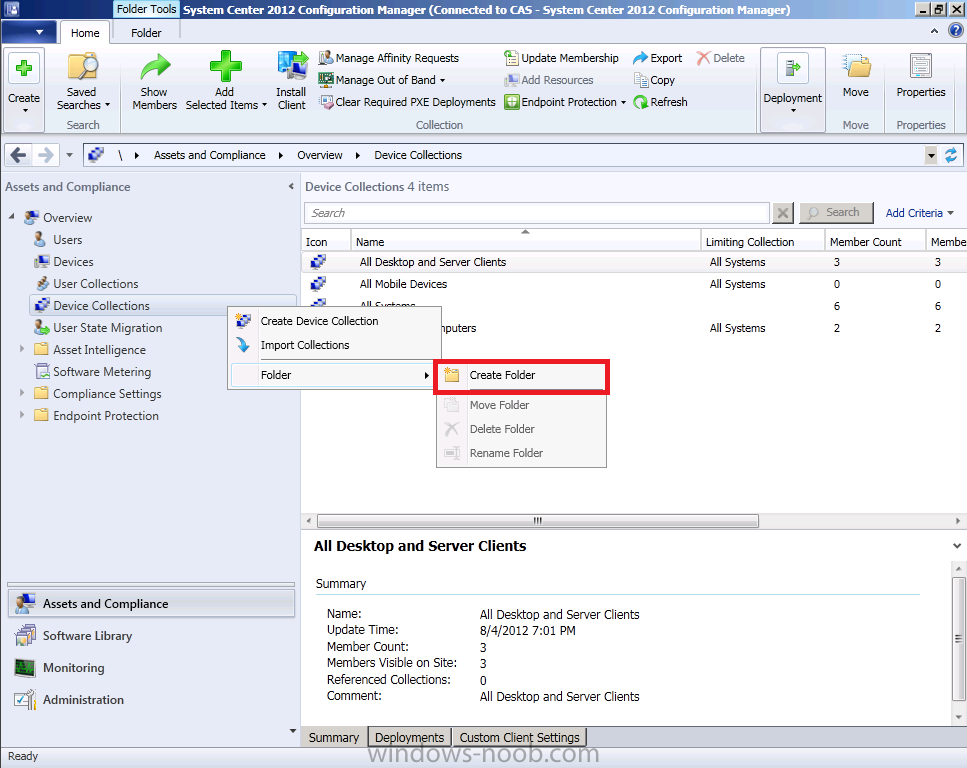
As Folders and Collections are Global data everything we create on the CAS will be replicated to our child Primary. On the CAS server select the Assets and Compliance workspace and right click on Device Collections, choose Create Folder.
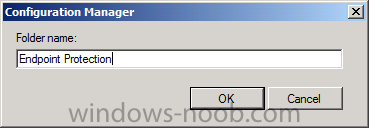
Give the folder a suitable name such as Endpoint Protection.
Once created we can see our new Endpoint Protection folder by clicking on the small triangle to the left of Device Collections, this triangle informs us that there are more things to see under Device Collections.

Click on the triangle and it reveals our new Endpoint Protection folder.

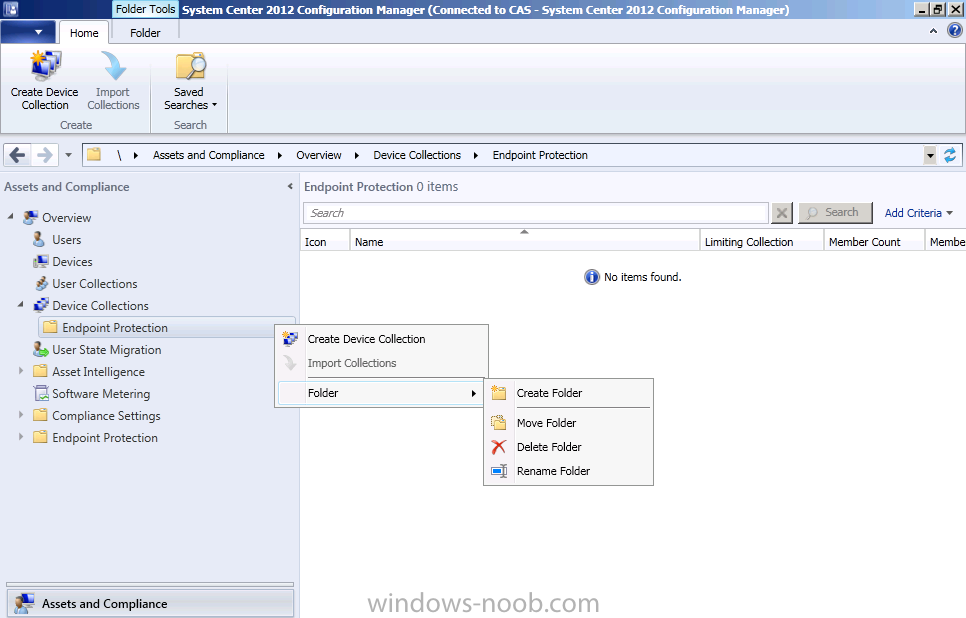
Now we will create some additional Folders underneath our top most Endpoint Protection folder, this will allow us to separate Servers from Desktops and Laptops. Select the Endpoint Protection folder, right click and choose Folder, Create Folder.
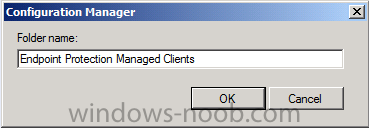
The first folder will be called Endpoint Protection Managed Clients
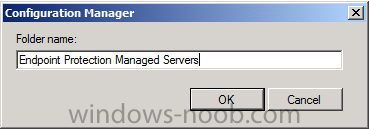
repeat the above process and create another folder called Endpoint Protection Managed Servers.
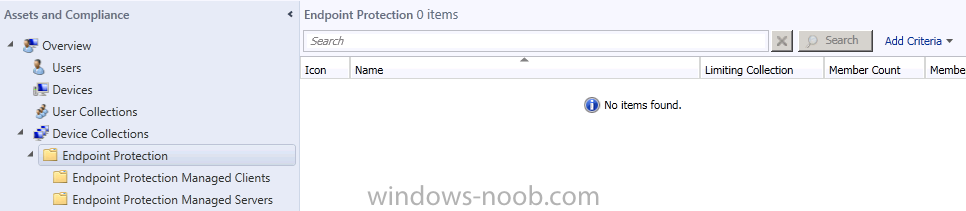
Once done, you can now click on the small triangle beside our Endpoint Protection folder, and review our new folders.
Next we will populate these folders with some new collections.
Step 2. Create Endpoint Protection Device Collections to categorize computers.
Note: Perform the following on the CAS server as SMSadmin
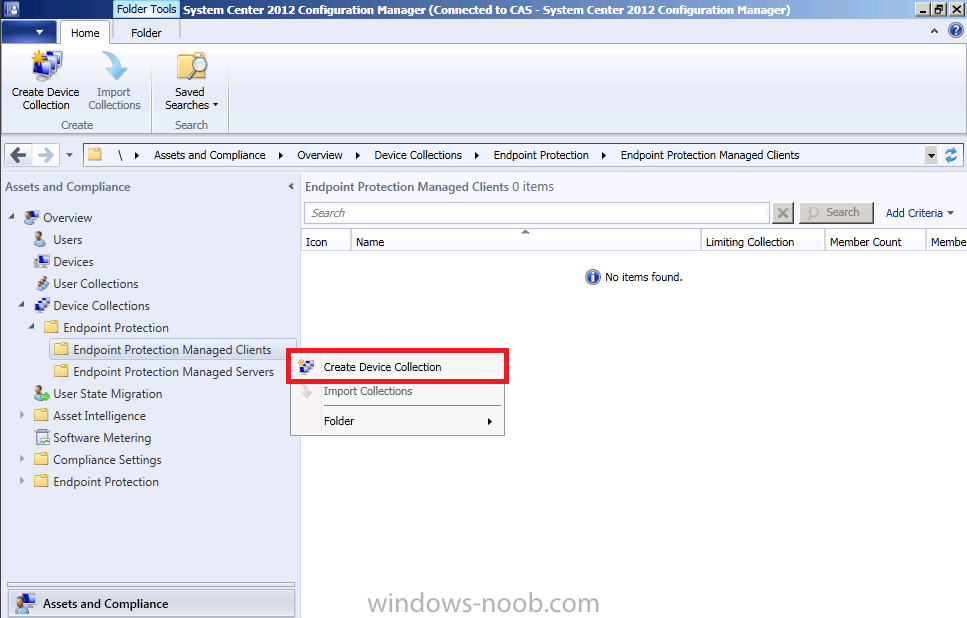
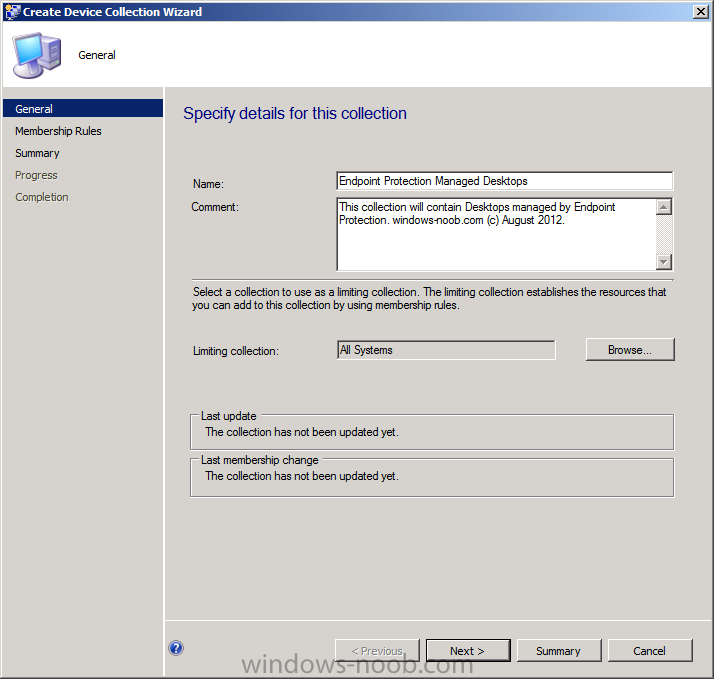
Expand our Endpoint Protection Managed Clients folder and right click, select Create Device Collection.
Create two new collections with no membership rules and limited to the All Systemscollection:
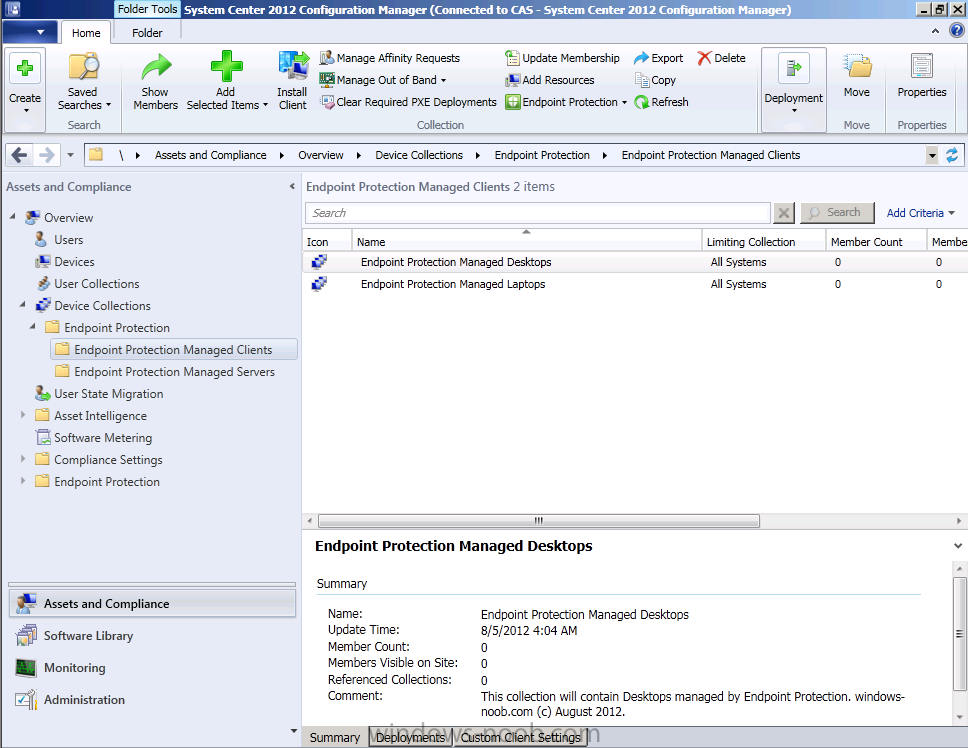
- Endpoint Protection Managed Desktops
- Endpoint Protection Managed Laptops
so we end up with the following under our Endpoint Protection Managed Clients folder.
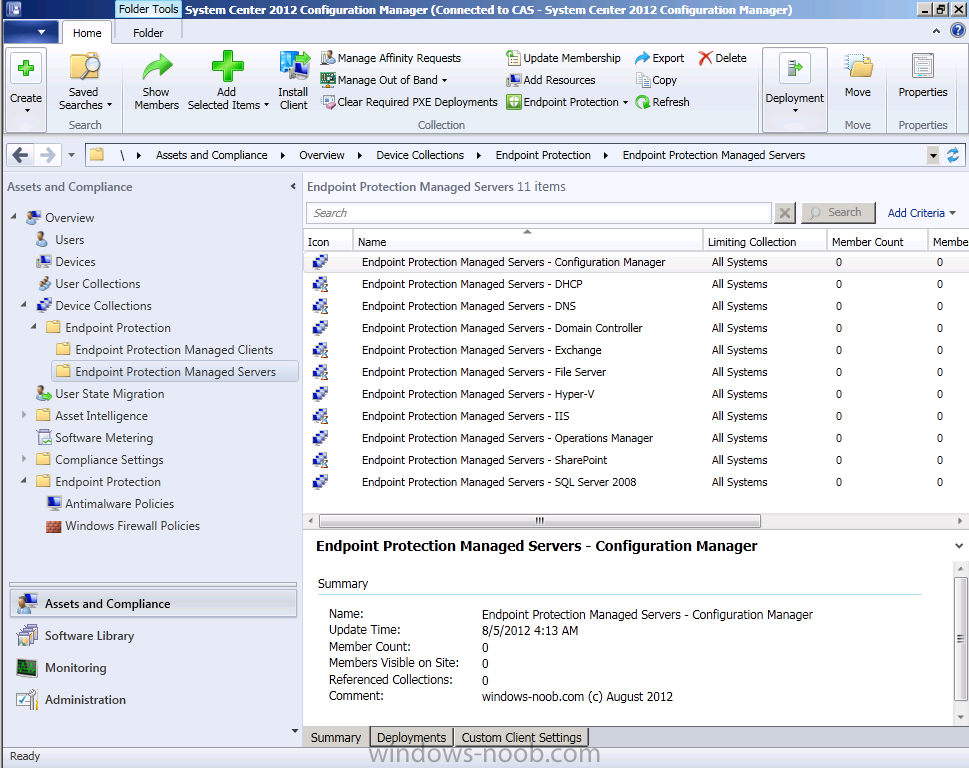
Using the above method, create the following collections under our Endpoint Protection Managed Servers folder. The exact number of server collections is up to you, create what you need for your organization, the list below is a suggestion of typical server roles and makes it easy for you to target custom antimalware policies and custom client device settings to those unique server roles in your organization. Add the collections you need in your organization (Note that some Windows server roles which you use may not be listed below, if that is the case then simply create your own).
- Endpoint Protection Managed Servers – Configuration Manager
- Endpoint Protection Managed Servers – DHCP
- Endpoint Protection Managed Servers – IIS
- Endpoint Protection Managed Servers – Domain Controller
- Endpoint Protection Managed Servers – Exchange
- Endpoint Protection Managed Servers – File Server
- Endpoint Protection Managed Servers – Hyper-V
- Endpoint Protection Managed Servers – IIS
- Endpoint Protection Managed Servers – Operations Manager
- Endpoint Protection Managed Servers – SharePoint
- Endpoint Protection Managed Servers – SQL Server 2008
Once you have created your new collections, the Endpoint Protection Managed Servers collections should look like this:
Tip: if you don’t want to manually enter all this information you could create a Powershell script to achieve the same thing, here’s a sample script to do help you (Powershell knowledge required).
At the moment our new collections are all empty and that’s ok, you can populate them however you want, either using direct membership or queries. Do make sure that the correct type of device is in the collection in question so that when we target our custom device settings and custom antimalware policies to those collections that the correct devices are receiving the correct antimalware settings/policies.
Step 3. Enable the Endpoint Protection role
Note: Perform the following on the CAS server as SMSadmin
The Endpoint Protection point site system role must be installed before you can use Endpoint Protection or before you can create custom Endpoint Protection client settings. It must be installed on one site system server only and it must be installed at the top of the hierarchy on a central administration site or a standalone primary site. As we have a hierarchy consisting of a CAS and child Primary, we will install the role on our CAS server. If you are following this guide and using only a standalone primary server then you must install the Endpoint Protection role on that server.
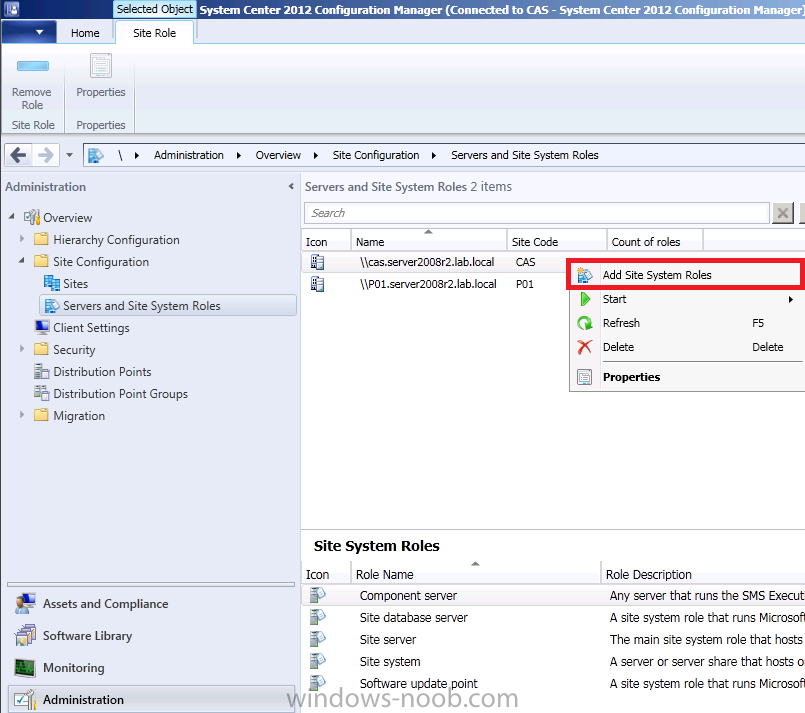
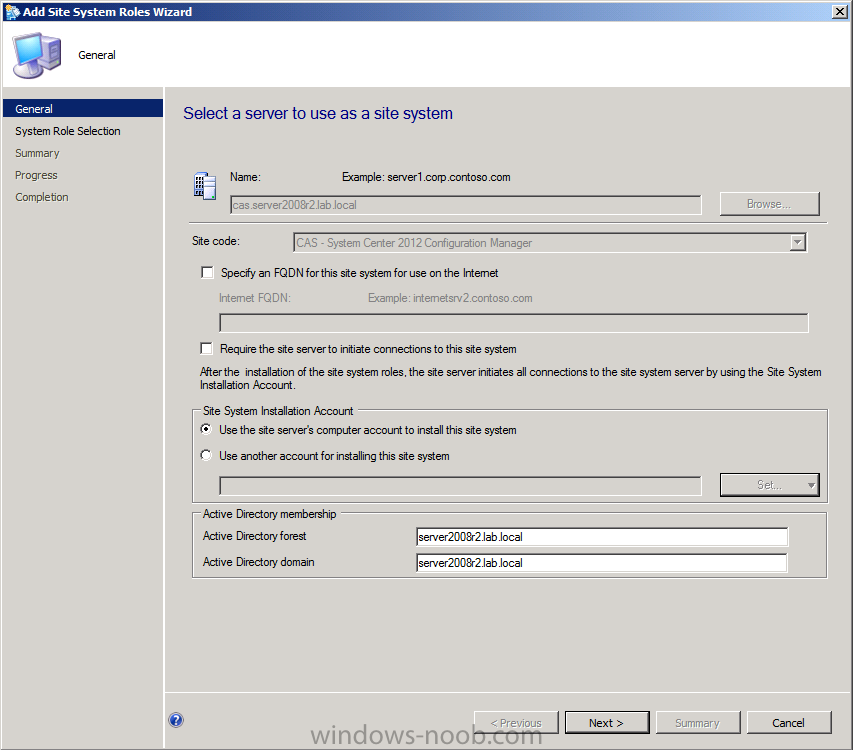
In the Administration workspace, expand Overview and expand Site Configuration, select Servers and Site System Roles. Right click on our CAS server and select Add Site System Roles.
make any changes necessary on the Add Site System roles Wizard screen and click next,
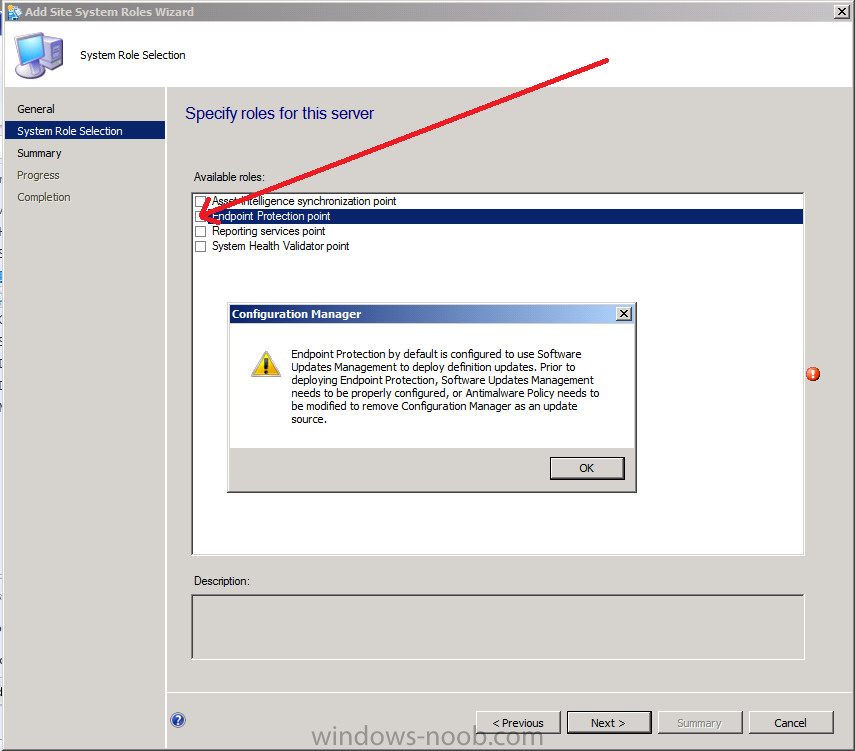
Select the Endpoint Protection point role and take note of the popup screen, we have already configured our SUP to Synchronise Definition Updates in Part 5 of this series however if you have not completed that part yet please review it now, or alternatively you’ll have to remove Configuration Manager as an update source in your Custom Antimalware Policies.
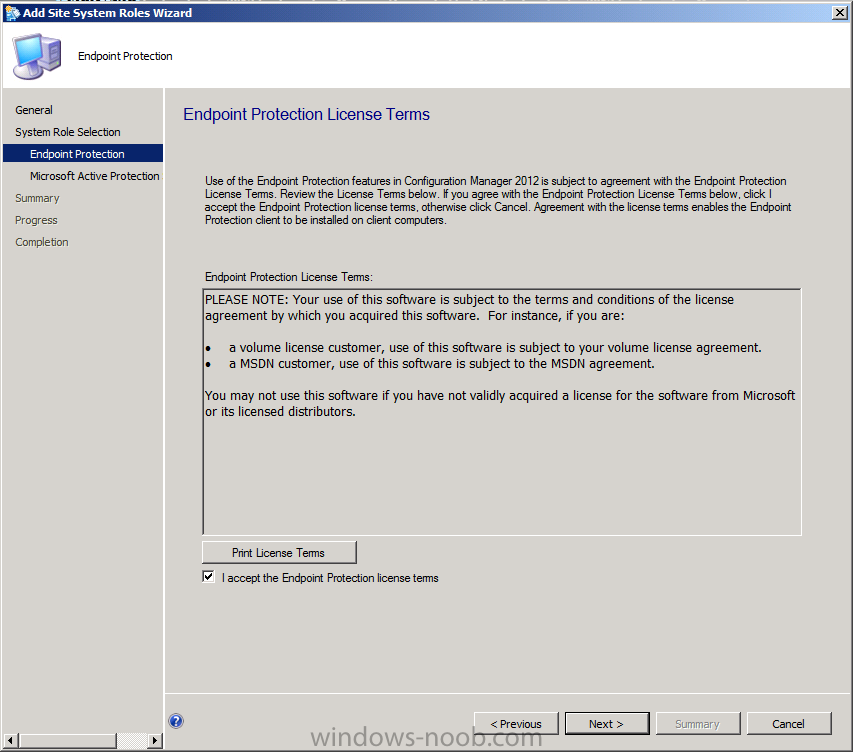
Accept the Endpoint Protection License based on your License aggreement with Microsoft
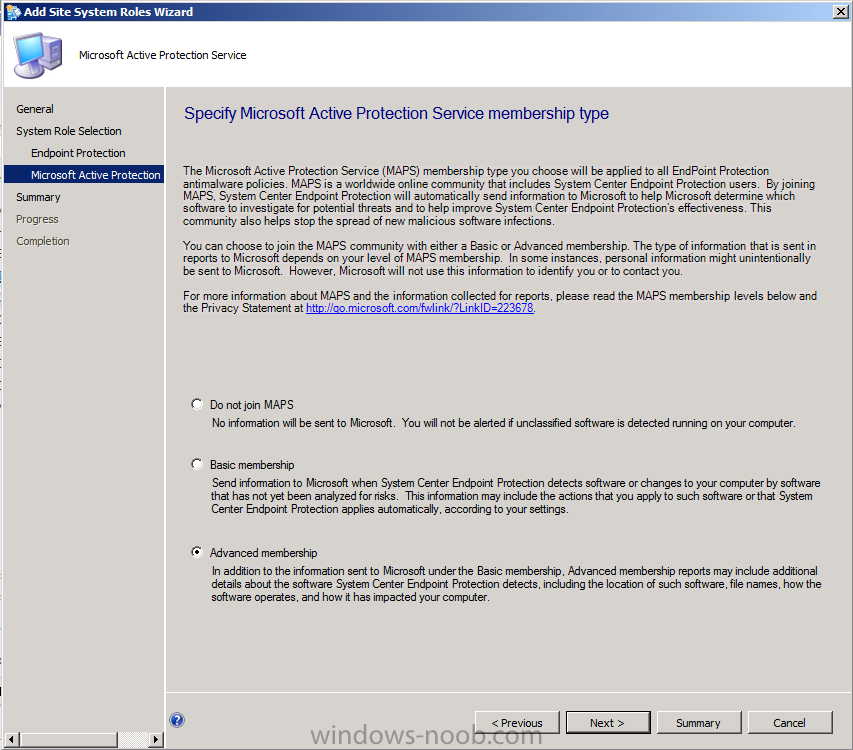
and select your MAPS membership type which applies to your entire heirarchy as the default setting (this can be changed for all custom antimalware policies later). Select Advanced Membership.
click your way through the rest of the wizard.
Within a few minutes you’ll see the Endpoint Protection client (SCEP Client) appear in the system tray of your CAS Server.

Note: The installation of the SCEP client on the CAS server is normal behaviour and is expected. You must have the SCEP client installed on your ConfigMgr Server hosting the Endpoint Protection role. This SCEP client is used to convert Animalware IDs in the Configuration Manager database and can co-locate with another Antivirus solution on this server if necessary. This SCEP client is currrently unmanaged and does not scan for malware and does not use real time protection unless you target this server with custom antimalware policies and custom client settings which enable this functionality.
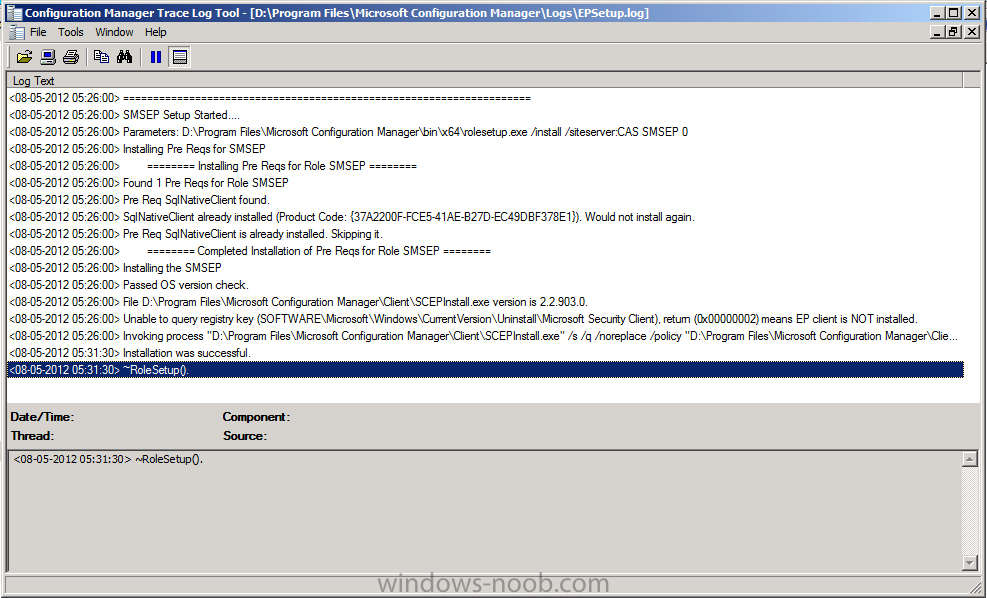
Tip: you can review the EPSetup.log located at D:\Program Files\Microsoft Configuration Manager\Logs on the server to monitor role installation progress. Look for the line which states Installation was successful to reflect a succesful installation of the Endpoint Protection Point role.
Step 4. Configure Alerts for Endpoint Protection.
Note: Perform the following on the CAS server as SMSadmin
You can configure Endpoint Protection alerts in System Center 2012 Configuration Manager to notify administrative users when specific security events occur in your hierarchy. Notifications display in the Endpoint Protection dashboard in the Configuration Manager console, in reports, and you can configure them to be emailed to specified recipients. – Technet: http://technet.micro…y/hh508782.aspx.
Configure Email Notification (Optional)
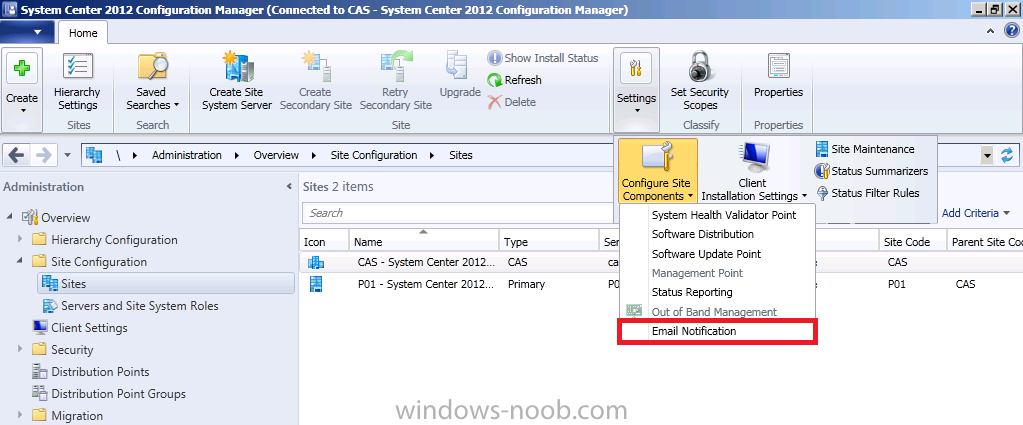
If there is a malware breakout in your organization, you’d want to be notified as soon as possible, provided that there are no issues with your email servers or firewalls you can get email notification in minutes of an outbreak provided that you have first configured email notification. You will need access to an SMTP server to configure Email Notification Alerts. In the configmgr console, click on Administration, expand Overview and expand Site Configuration, select Sites and click on Settings in the ribbon and click on Configure Site Components and select Email Notification.
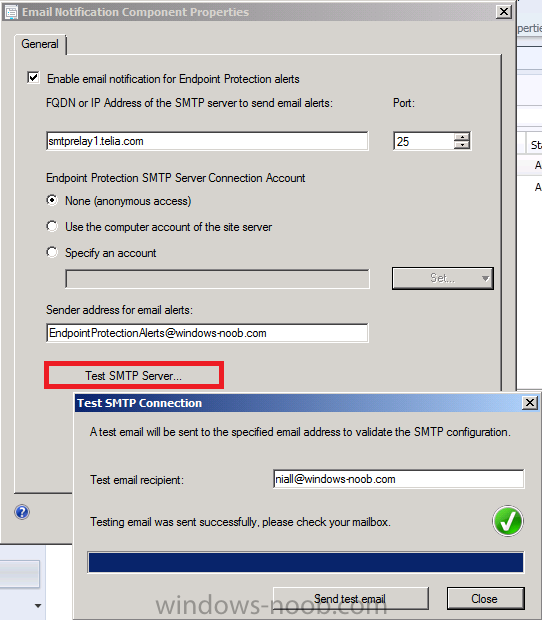
Enter your desired settings for SMTP and click Apply. You can test your SMTP settings also by clicking on Test SMTP server. This will give you feedback as to whether the email was sent or not or whether there were problems contacting the SMTP server.
As long as the test above didn’t show any warning or error, now is a good time to check the inbox of the email address you specified in the test email recipient field, you should see a new (blank) email with the following Subject:
Quote
Configure Alerts for device Collections
Note:- You cannot configure alerts for User Collections.
Next we will configure alerts for our Endpoint Protection device collections. In this example we will use our Endpoint Protection Managed Servers – Configuration Manager collection however you should repeat this process for each collection that you want to monitor for alerts in the Configuration Manager console, via the Endpoint Protection Reports and of course the Endpoint Protection Dashboard.
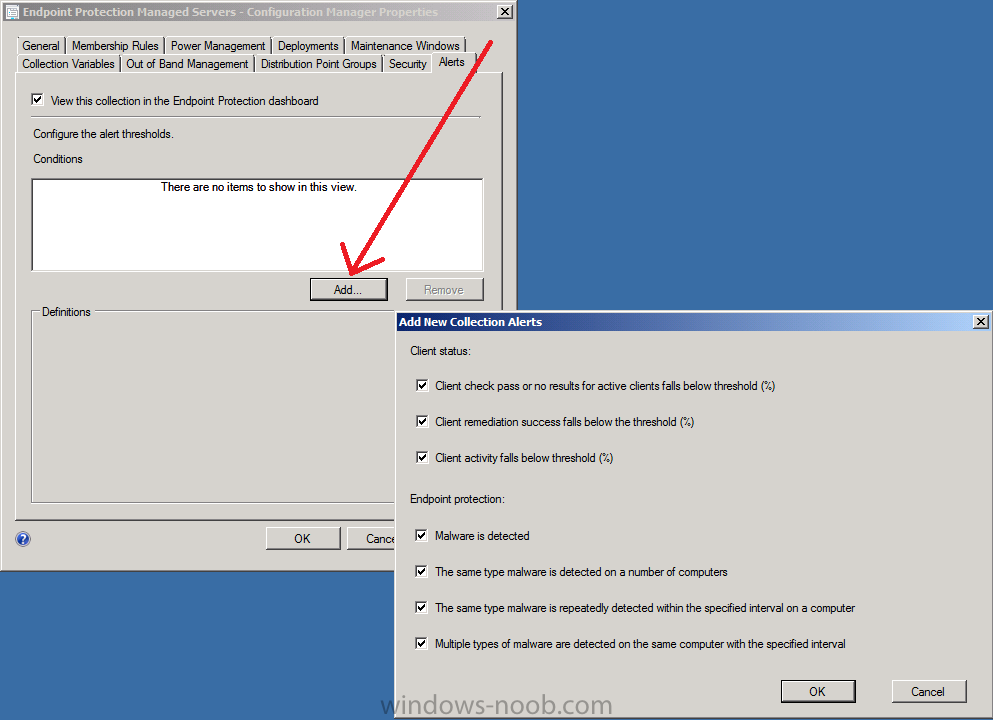
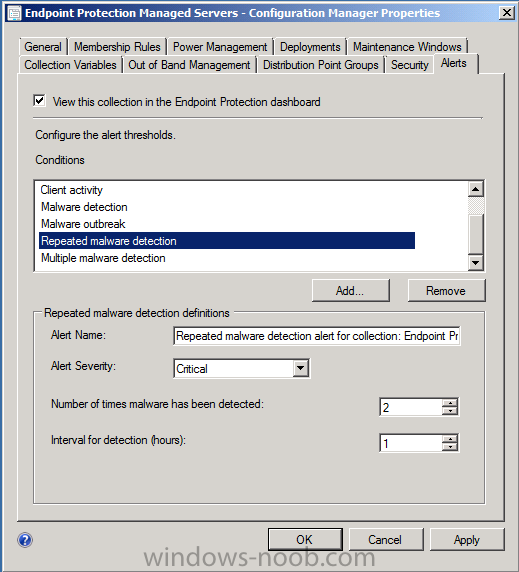
In Assets and Compliance, browse to the Endpoint Protection Managed Servers folder, and select the Endpoint Protection Managed Servers – Configuration Manager collection. Right click and choose properties. Click on the Alerts tab and place a checkmark in View this collection in the Endpoint Protection Dashboard and place a checkmark in those headings that interest you for client status and Endpoint Protection.
you can further configure the alert severity or other options (depending on the type of alert selected) in the Alerts screen once you’ve applied the above settings. In the example below the Repeated malware detection alert settings are listed.
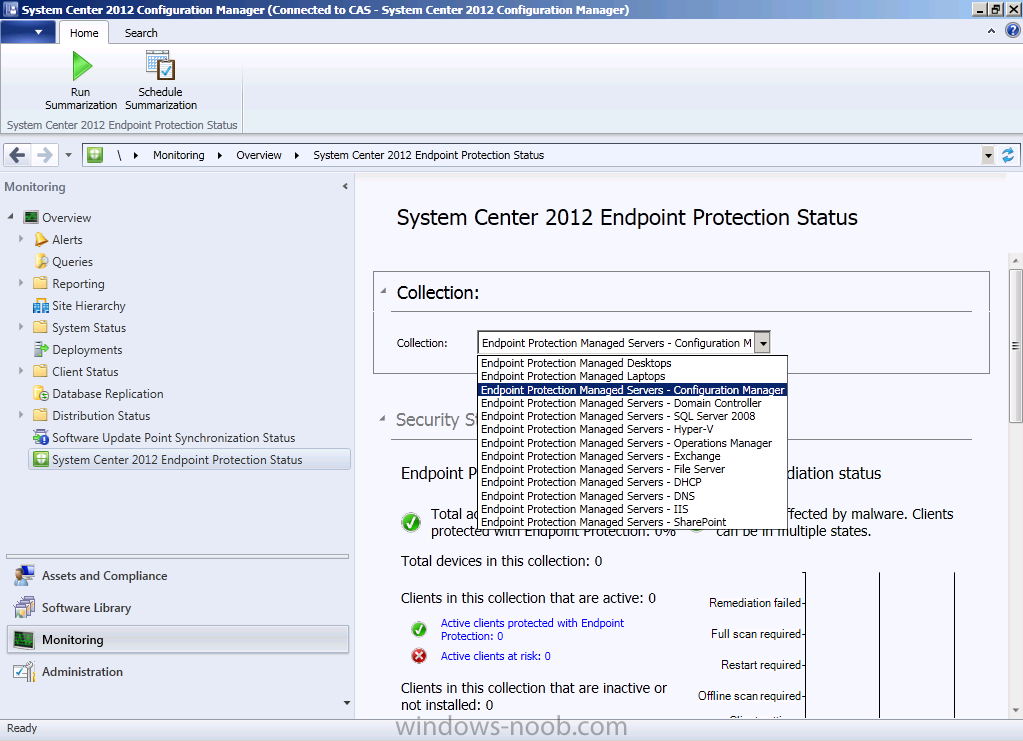
Once you’ve configured all the Endpoint Protection collections for Alerting, you can review Endpoint Protection dashboard (System Center 2012 Endpoint Protection Status) in the Monitoring workspace and select one of our 13 collections from the drop down menu. The information provided will change as data flows in once we deploy custom client device settings and custom antimalware policies to our Endpoint Protection collections.
Step 5. Add Forefront Endpoint Protection 2010 as a product and sync the SUP
Note: Perform the following on the CAS server as SMSadmin
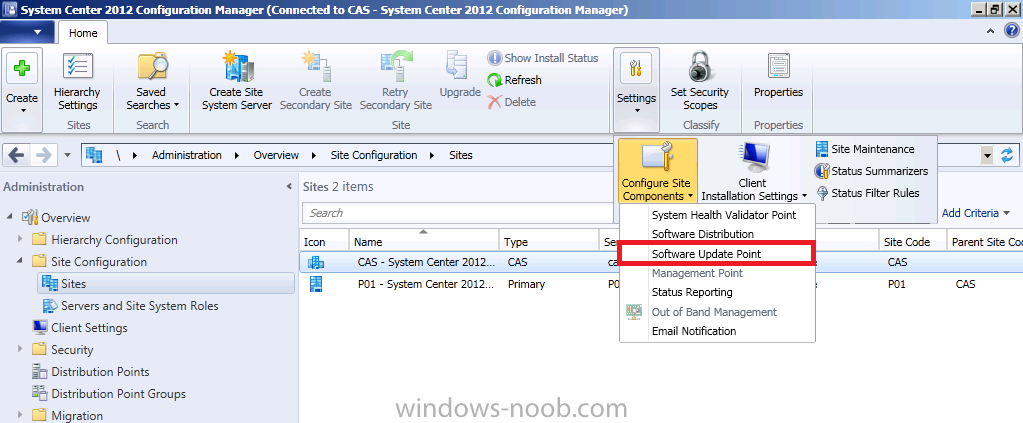
If you want your clients to get their definition updates from Configuration Manager, then you’ll need to configure your Software Update Point accordingly. Our SUP is already setup and configured as in Part 5, which means it will check for definition updates and synchronize with Microsoft on a schedule of once per day, however we need to add the Forefront Endpoint Protection 2010 product to our list of products to sync against otherwise we won’t see any Definition Updates appearing in our Software Update Point. In the Administration workspace, select Site Configuration, Sites, select our CAS server, and in the ribbon click on Settings, Configure Site Components, and select Software Update Point from the list.
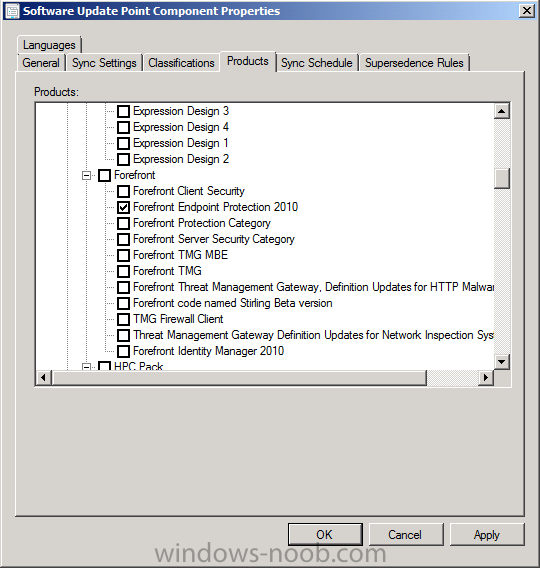
Select the Products tab, scroll down to Forefront and select Forefront Endpoint Protection 2010, click Apply.
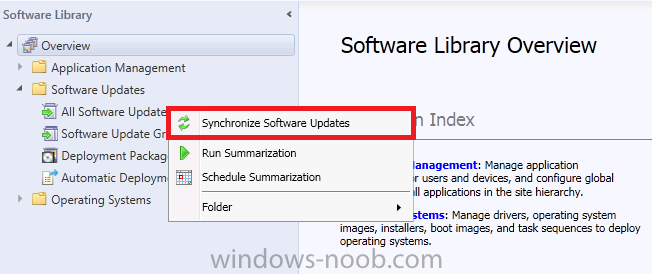
Next we will force a sync to Microsoft, select the Software Library workspace, select Software Updates, right click on All Software Updates and choose Synchronize Software Updates. Answer Yes to the popup.
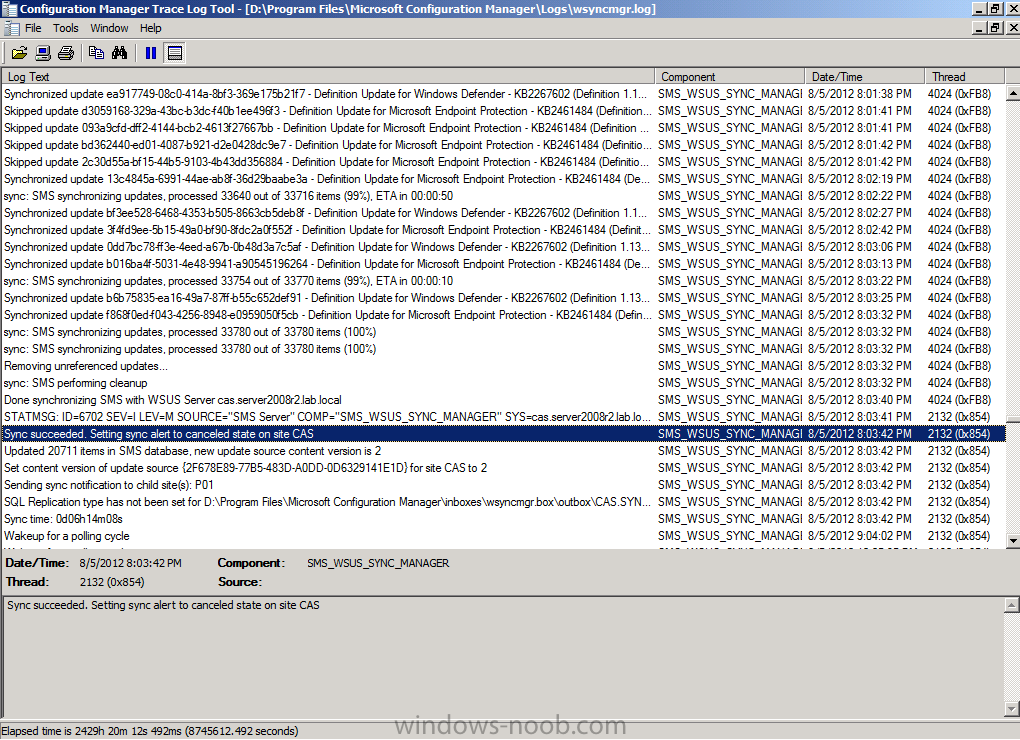
Tip: Review the wsyncmgr.log on the CAS server in D:\Program Files\Microsoft Configuration Manager\Logs to confirm that the sync has successfully completed. Look for a line that states Sync Succeeded. If it fails to sync make sure that the Update Services service on CAS has started.
Step 6. Configure SUP to deliver Definition Updates using an Automatic Deployment Rule
Note: Perform the following on the CAS server as SMSadmin
Before starting this step create a folder on D:\sources\WindowsUpdates\EndpointProtection on the CAS server to store our Endpoint Protection definition Updates. Our sources folder is shared as sources.
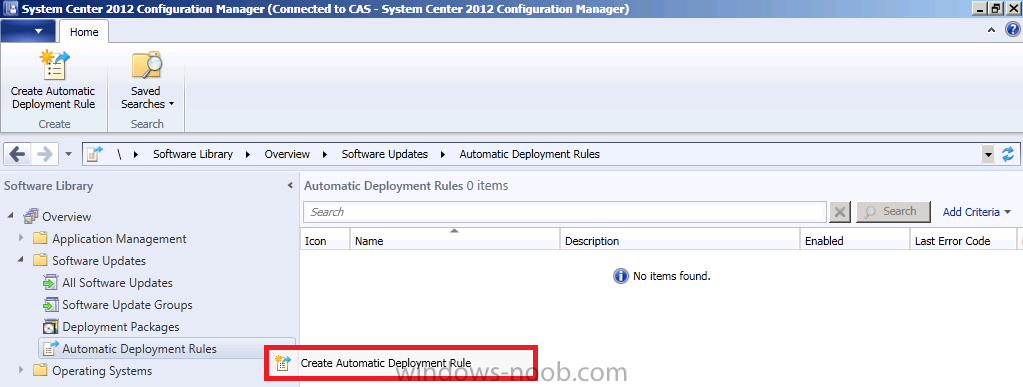
In the Configuration Manager console, click Software Library, expand Software Updates and click right click on Automatic Deployment Rules and choose Create Automatic Deployment Rule,
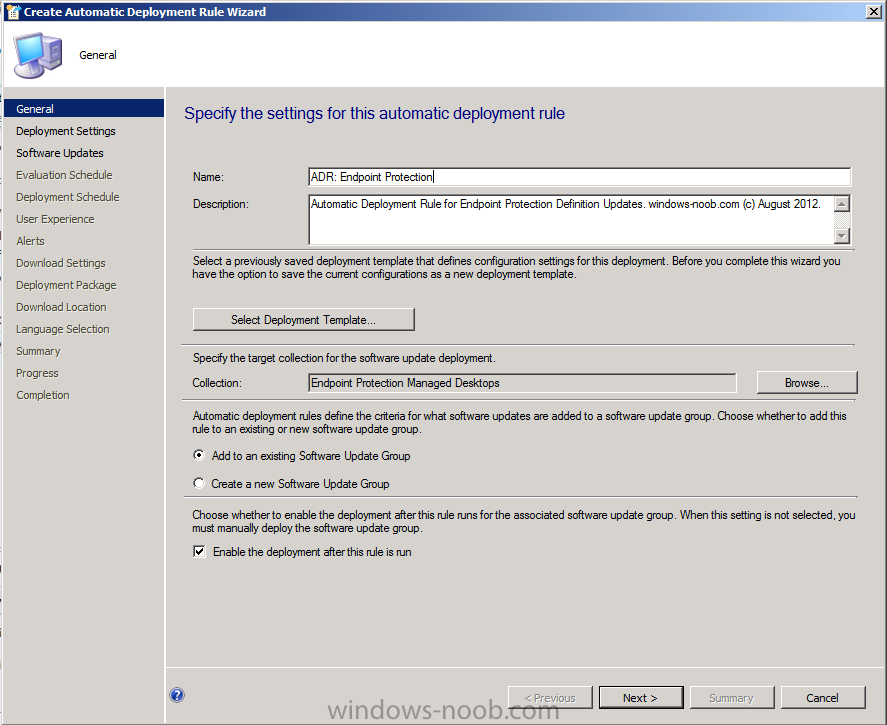
Fill in the details as below, for name use ADR: Endpoint Protection, the naming is important, think weeks, months, years ahead when you are searching for that Automatic Deployment Rule you or someone else created, prepending ADR: Endpoint Protection will easily separate these ADR’s from other ADR’s created by you or other admins for patch Tuesday software updates for example.
For target collection choose the collection you want to target with these definition updates, in our example we will select the Endpoint Protection Managed Desktops collection.
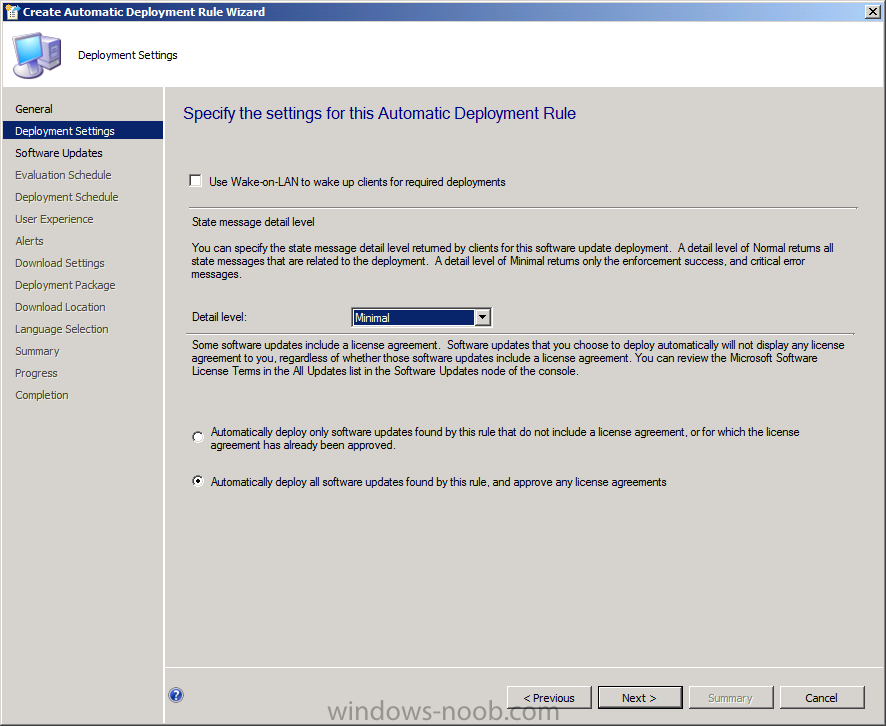
On the Deployment Settings page of the wizard select Minimal from the Detail level drop-down list and then click Next, this reduces the content of State Messages returned and thus reduces Configuration Manager server load.
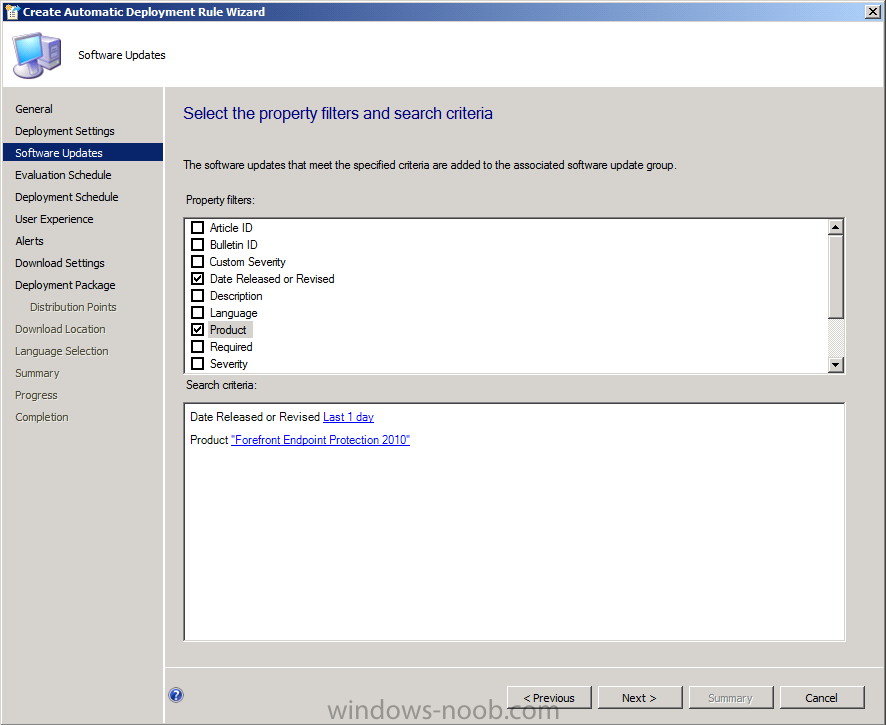
on the Software Updates page select Date Released or Revised, choose Last 1 day, and select Products, then select Forefront Protection 2010 from the list of available products.
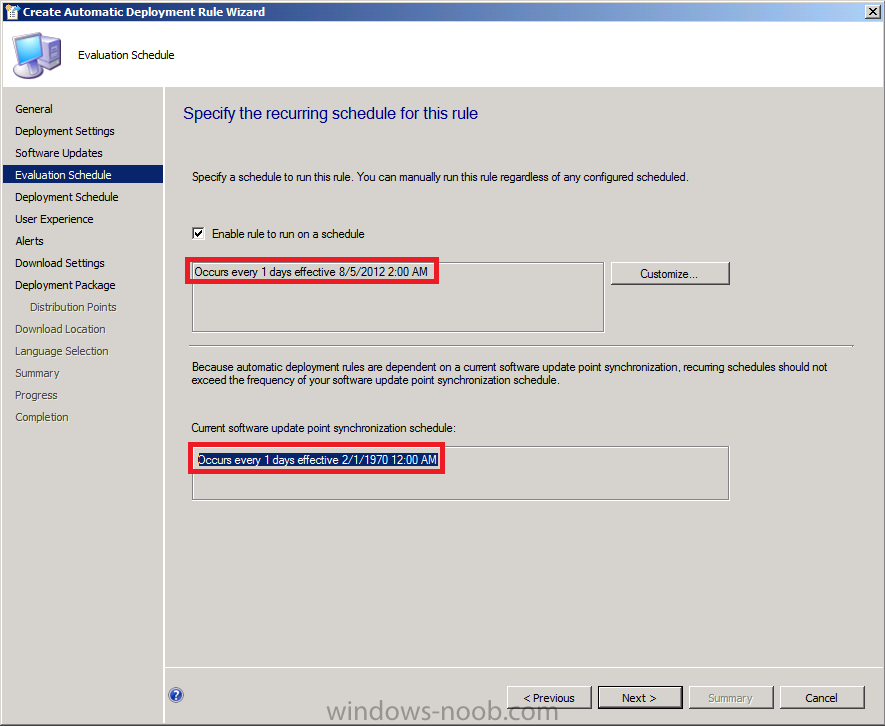
for Evaluation Schedule, click on Customize and set it to run every 1 days,
Tip: notice that the Synchronization Schedule is listed below, make sure that the SUP synchronizes at least 2 hours before you evaluate for Forefront Endpoint Protection definition updates, there is no point checking for updates if we haven’t synchronized yet.
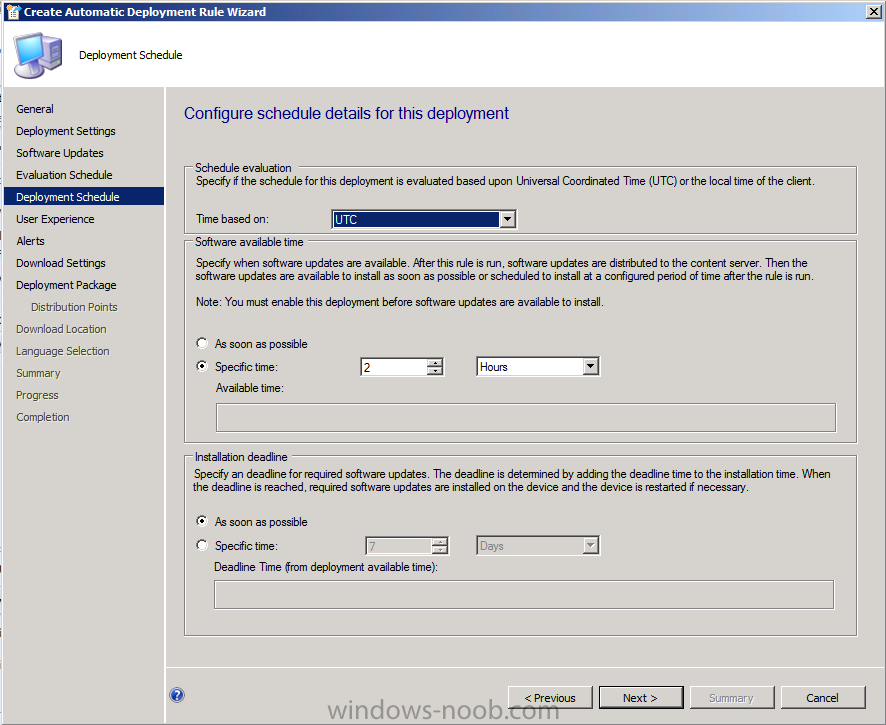
for Deployment Schedule set Time based on: UTC if you want all clients in the hierarchy to install the latest definitions at the same time, this setting is a recommended best practice. For software available select 2 hours to allow sufficient time for the Deployment to reach all Distribution Points and select As soon as possible for the installation Deadline.
Note: Software update deadlines are randomized over a 2-hour period to prevent all clients from requesting an update at the same time.
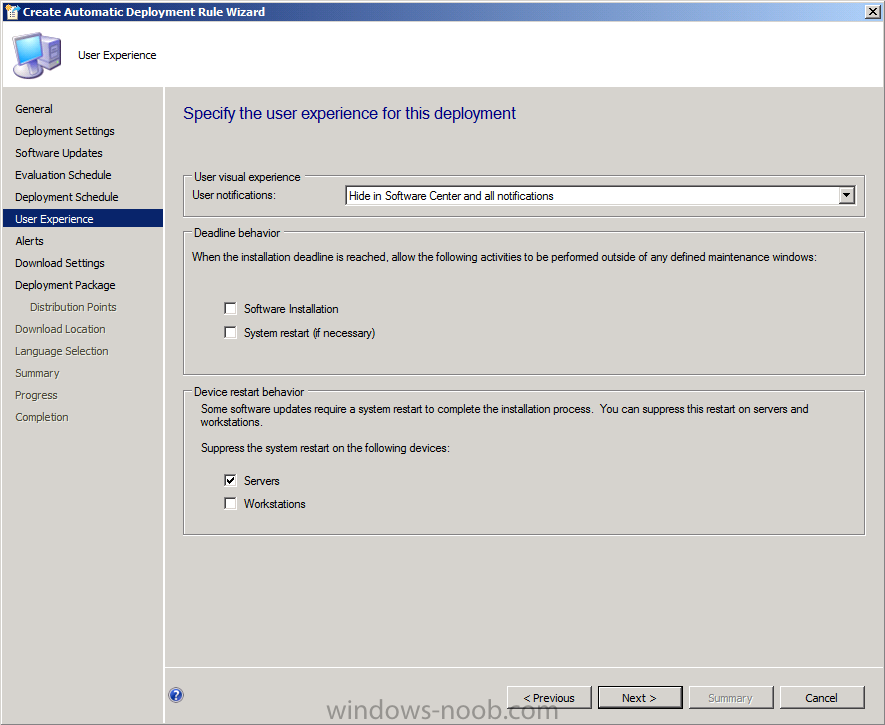
for the User Visual Experience select Hide from the drop down menu as we don’t want our users informed of new Definition Updates daily and supress restarts on Servers.
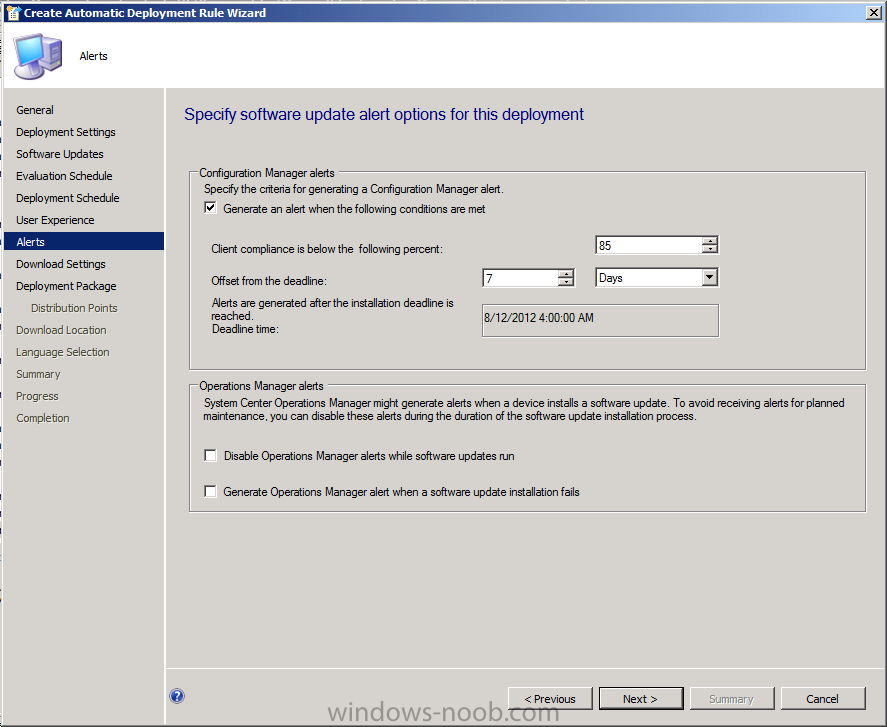
for Alerts enable the option to generate an alert, set the compliance percentage to be equal to the SLA you expect for that site, in this example we’ll select 85%.
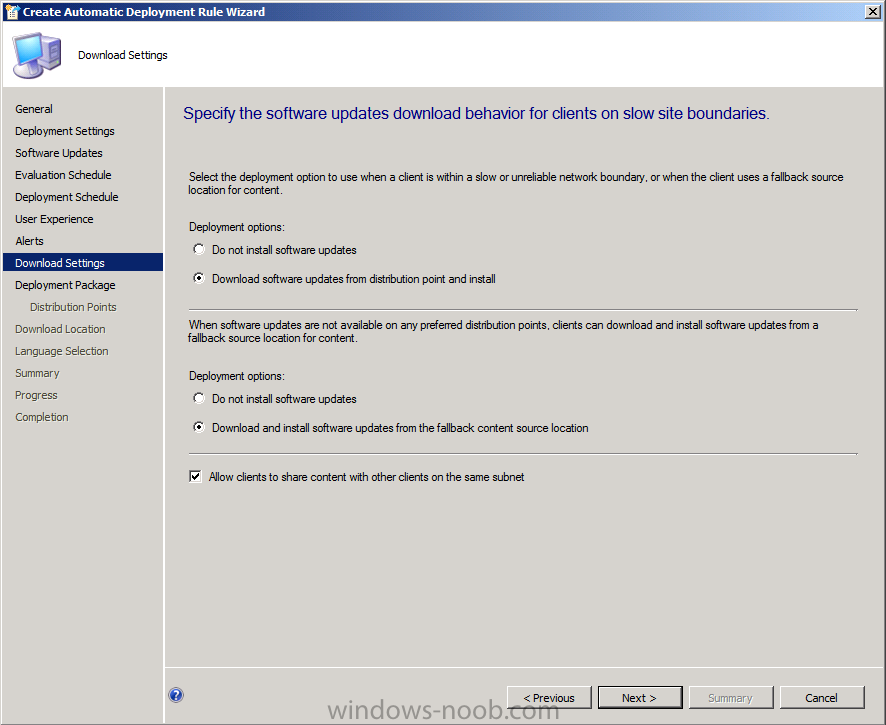
for Download Settings we want to be sure that our clients get these malware definitions regardless of whether they are on a slow site boundaries or not, so we will set both options accordingly.
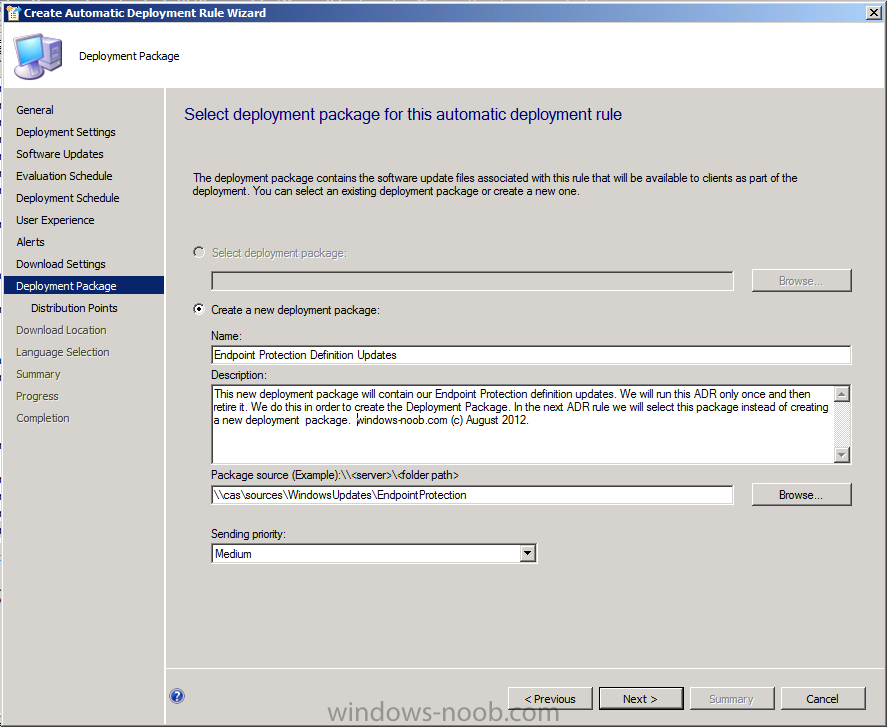
For Deployment Package we need to create a new Deployment Package, give it a suitable name like Endpoint Protection Definition Updates and point it to a previously created shared folder (\\cas\sources\WindowsUpdates\EndpointProtection).
Note: Make sure that \\cas\sources\WindowsUpdates\EndpointProtection exists otherwise the wizard will fail below when it tries to download as the network path won’t exist. In addition Everytime this ADR runs it will want to create a new deployment package as specified above, we do not want this to happen so after running the ADR once, retire it by right clicking on the rule and select Disable and create a new ADR except this time point the deployment package to the package which is now created called Endpoint Protection Definition Updates.
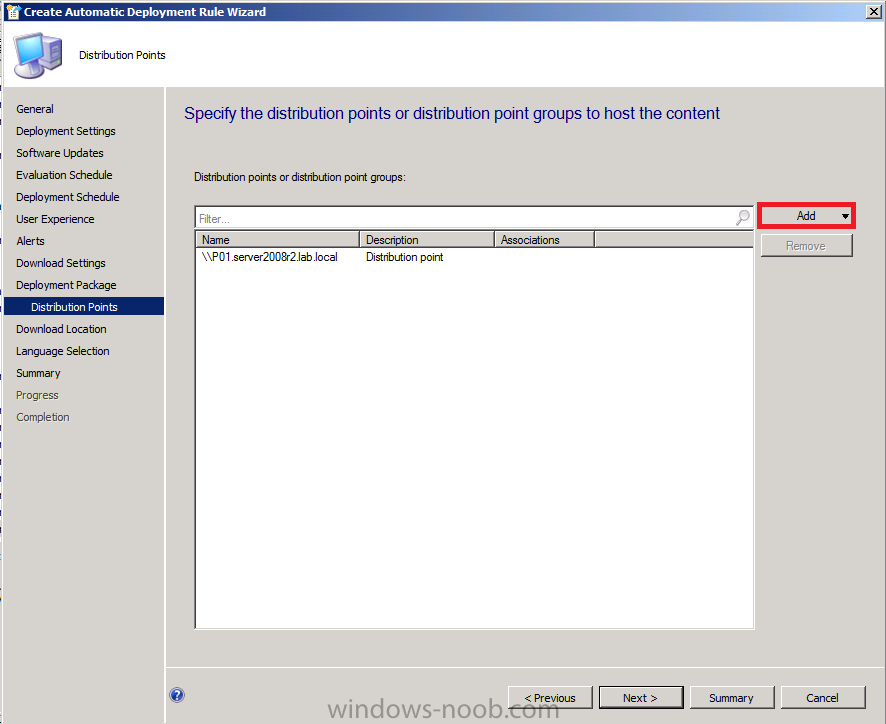
For Distribution Points click on the drop down Add button and select distribution point, select our distribution point on our primary server (P01) and click ok.
click your way through the rest of the Wizard until you reach the summary screen but before finishing the wizard click on save as template in order to speed up entering values in the remaining ADR’s you’ll be creating.
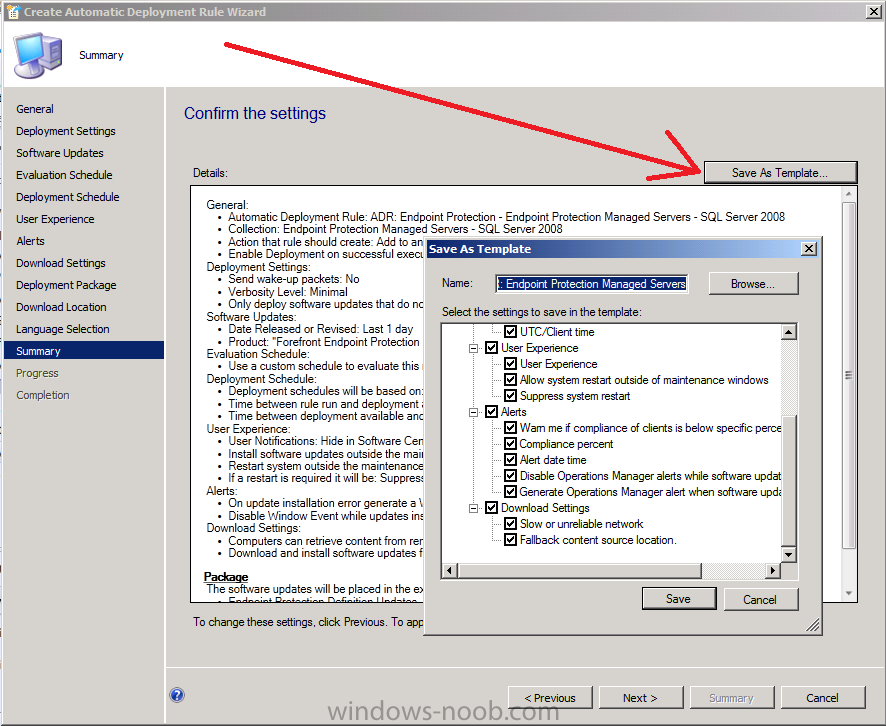
once done, complete the wizard and the template is ready for use the next time you create a new ADR.
Note: You must repeat the above process for each collection you want to target with Endpoint Protection definition updates delivered from Configuration Manager using an Automatic Deployment Rule.
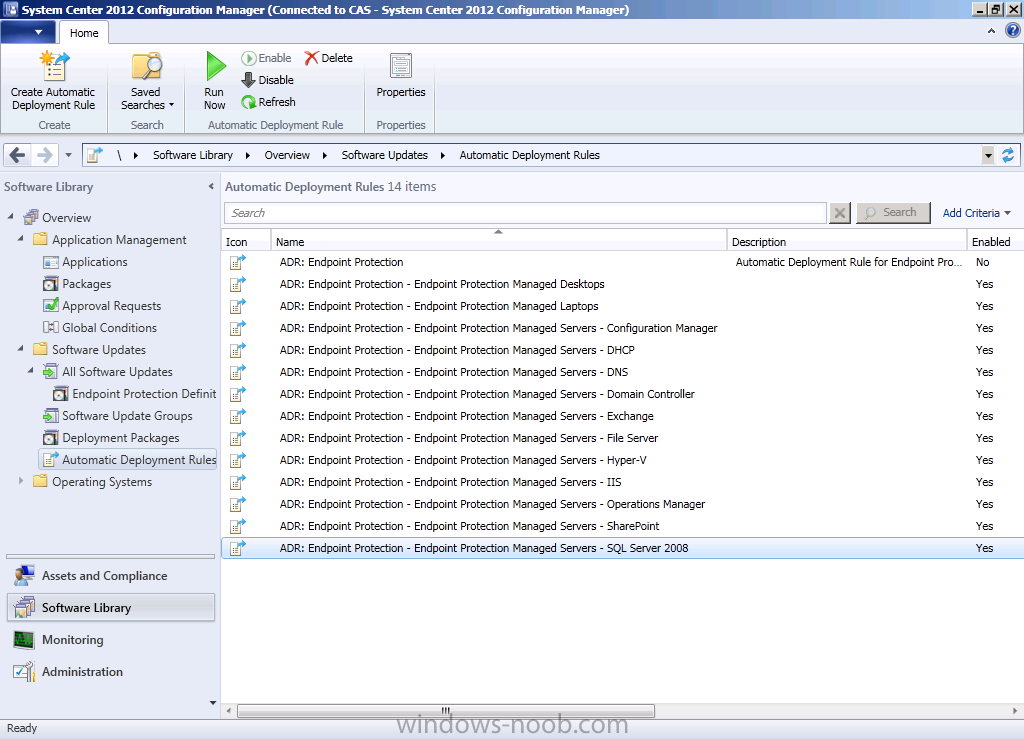
Below is a screenshot showing the 13 additional ADR’s I’ve created, note how the first ADR is disabled (that was used for creating the deployment package).
Step 7. Configure custom antimalware policies
Note: Perform the following on the Primary Site server (P01) or on CAS as SMSadmin.
Antimalware Policies for Endpoint Protection define how and where the computers get their definition updates, how and when to scan for malware, what to do when it’s detected and a multitude of additional options. You can create many custom antimalware policies and target them (Deployment) to your Endpoint Protection collections. Microsoft provides several built-in policies out of the box that you can simply import and then deploy to your chosen collection.
Tip: Do not configure the default client AntiMalware Policy unless you are sure that you want these applied to all computers in your hierarchy. Custom antimalware policies always take precedence over Default antimalware policies as they have a higher priority.
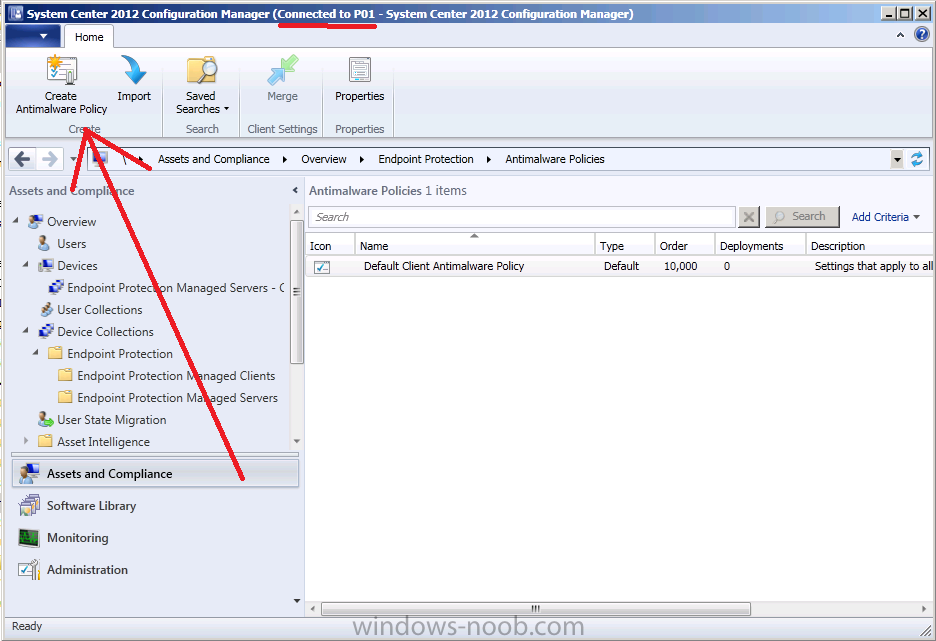
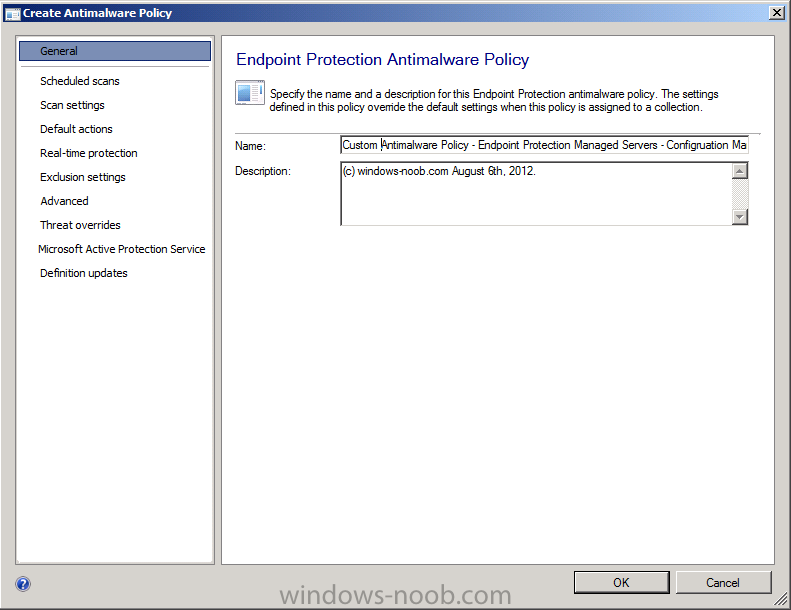
On your Primary server P01 (or CAS) , click Assets and Compliance, click Endpoint Protection, select Antimalware Policies. In the ribbon select Create Antimalware Policy
give the policy a suitable name like Custom Antimalware Policy – Endpoint Protection Managed Servers – Configuration Manager
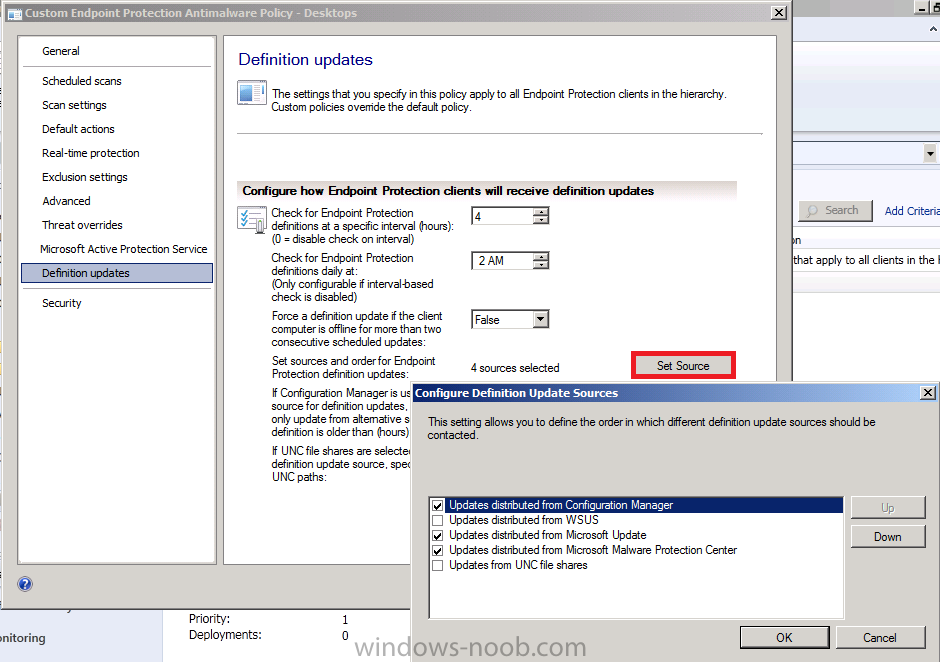
I won’t go into details about the specific settings you should enter, every customer is different. If you want details of what is recommended for a server or desktop then either import the built-in policies and use them, change them, examine them, or read Chapter 16 of the System Center 2012 Configuration Manager Unleashed book, or review this page on Technet.
Tip: Do you want your mobile clients to be patched regardless of whether they can contact your Configuration Manager server or not ? if so, select both Windows Update as well as Configuration Manager as sources. In addition you can increase the frequency of checking for updates to a few times a day even though Configuration Manager (in RTM) can only sync once a day, if you have a source pointing to Windows Update and a working internet connection then your clients can get patched against malware three times per day. The screenshot below is for your mobile clients (not necessarily for your Configuration Manager servers themselves).
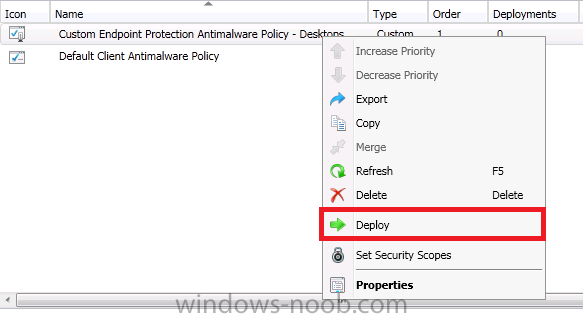
Once your custom Endpoint Protection antimalware policy is created, right click on it, and choose Deploy
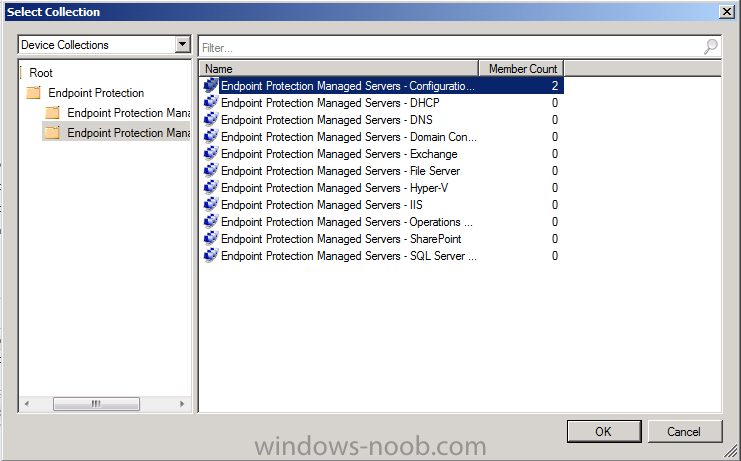
Target the policy to the appropriate collection – job done, now repeat the above process for each Endpoint Protection collection you created. In the screenshot below a custom antimalware policy is being deployed to the Endpoint Protection Managed Servers – Configuration Manager collection where i’ve placed both our CAS and P01 servers.
TIP: you can merge two or more policies together to blend the settings, for example import an SQL Server 2008 policy and a Configuration Manager 2012 policy and you’ll get a suitable custom antimalware policy for your Configuration Manager 2012 servers which have SQL on box.
Step 8. Configure custom device settings
Note: Perform the following on the Primary Site server (P01) as SMSadmin.
The above actions are all well and good but will do nothing until the clients receive policy to tell them that they are managed by Endpoint Protection. That is done via client settings in particular the Endpoint Protection section. Custom Client Device settings always take priority over the Default Client Settings. So lets create a brand new custom client device settings.
Note: Do not configure the default client settings (for Endpoint Protection) unless you are sure that you want them applied to all computers in your hierarchy.
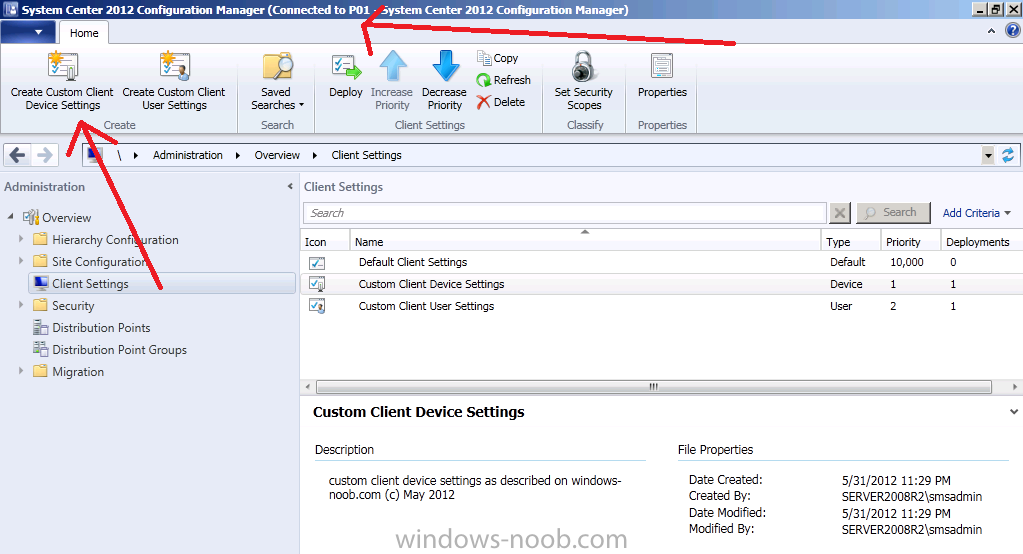
On your Primary Server P01, in the Administration workspace, right click on Client Settings and choose Create custom client device settings.
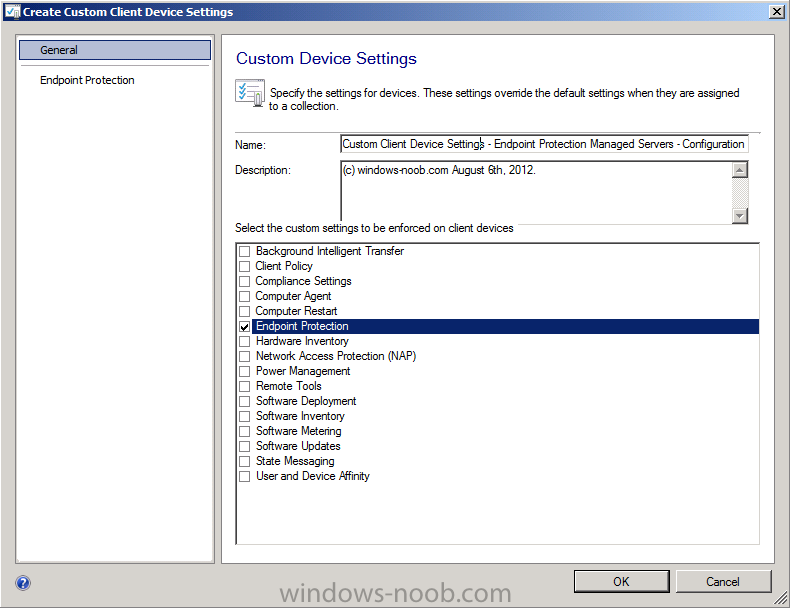
give it a suitable name like Custom Client Device Settings – Endpoint Protection Managed Servers – Configuration Manager and select Endpoint Protection from the list of options in the left pane.
set Manage Endpoint Protection Client on client computers to True if you want to manage your computers..
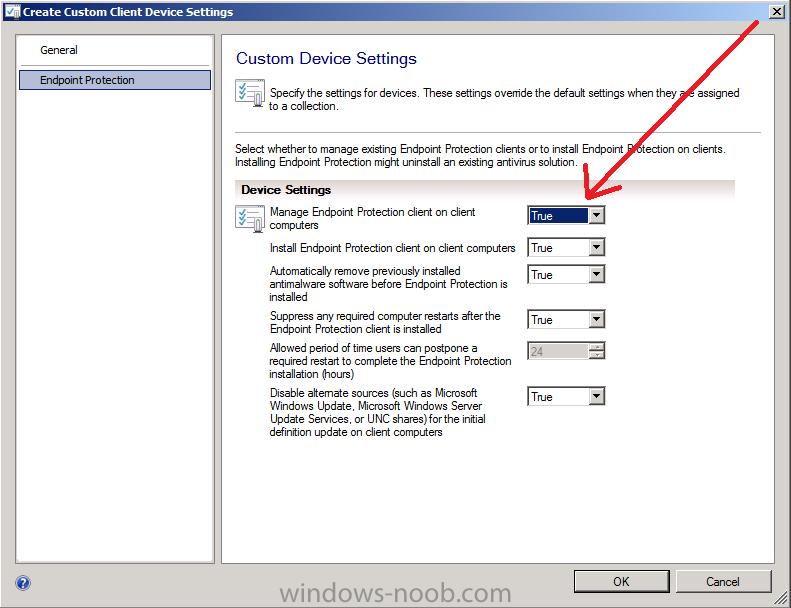
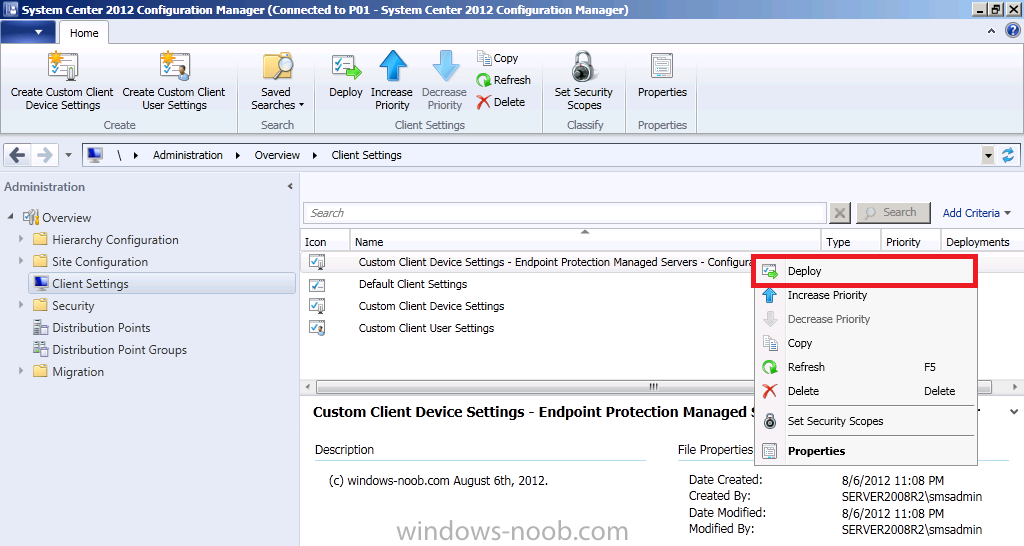
You can configure the other options available as suited for your organization before deploying this to the collection you want to be managed by Endpoint Protection. In this example we will deploy the custom client device settings to our Endpoint Protection Managed Servers – Configuration Manager collection by right clicking on our custom client settings and choosing deploy.
Don’t forget to repeat the above for each Endpoint Protection collection that you want to manage Endpoint Protection on, and that’s it, job done, sit back and watch as the Endpoint Protection client (SCEP client) gets installed on all computers that you targetted, and not only that, your custom antimalware policies take effect and they automatically patch themselves against malware every day.
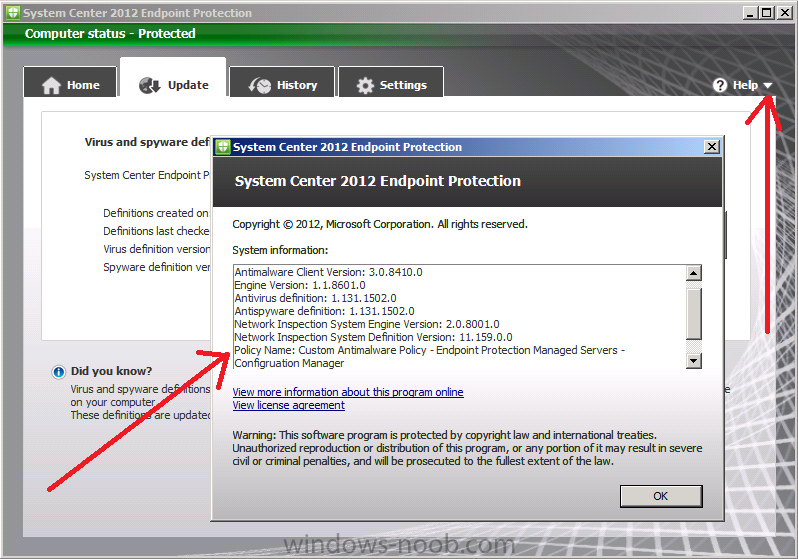
To verify your policy is getting applied on either CAS or P01 open the SCEP client and click on about, click on the downward pointing arrow beside help and select About System Center Endpoint Protection. You can scroll down to see the date it was applied and to confirm the policy name, if it’s not what you expected then something is not working. The result should look like this, cool huh ? oh yeah.
Note: If you are having issues with the client installing or getting the Endpoint Protection role installed please refer to the following Endpoint Protection Log files.
- EndpointProtectionAgent.log – Records details about the installation of the Endpoint Protection client and the application of antimalware policy to that client.
- EPCtrlMgr.log – Records details about the synchronization of malware threat information from the Endpoint Protection role server into the Configuration Manager database.
- EPMgr.log – Monitors the status of the Endpoint Protection site system role.
- EPSetup.log – Provides information about the installation of the Endpoint Protection site system role.
Troubleshooting:
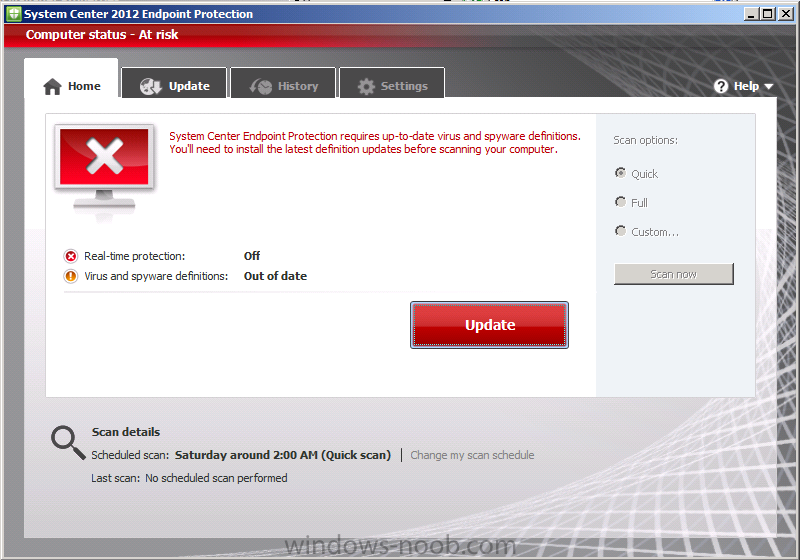
After the SCEP client is installed it will at first appear to be in an unmanaged state (until all policies are received and processed). As a result it will probably look as follows just after it has been installed.
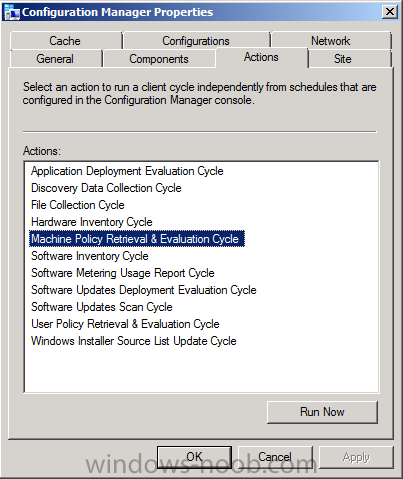
To speed things up you can open up the Configuration Manager client on that computer and click on the Actions tab, trigger a Machine Policy Retrieval and Evaluation Cycle and trigger a Software Updates Deployment Evaluation Cycle (or wait until the alloted time for policy to refresh on the clients occurs).
Once the clients have received and processed all policy, they will attempt to update the Antivirus Definitions from the sources listed in our custom antimalware policies, and once applied the SCEP client will look it’s familiar Green. In the example screenshot below the SCEP client has updated itself to the latest available definition updates on my Configuration Manager server, and they were last synced (to the internet) 2 days ago. As this is a lab I have the ability to enable/disable internet for those computers and the last internet available was two days ago.
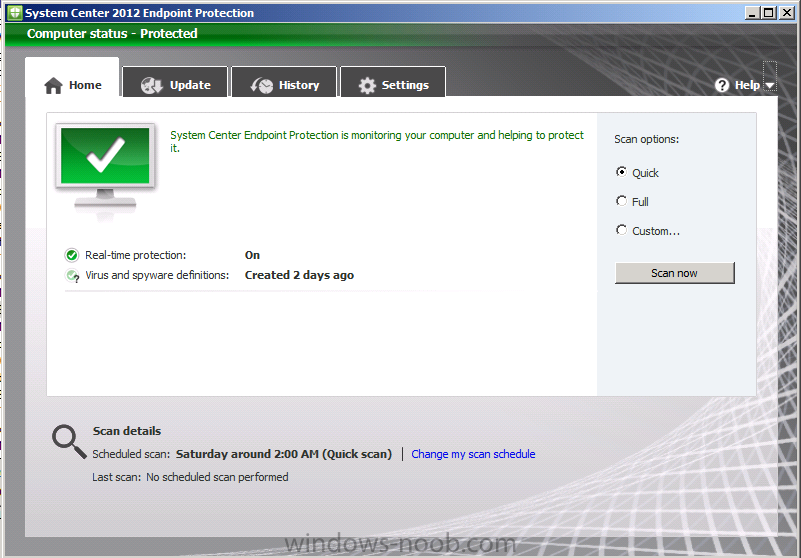
What this shows you is it’s working perfectly, it has received it’s custom Antimalware policy, it has updated itself using the SUP as the source and taken the latest available definition updates that were on the SUP.
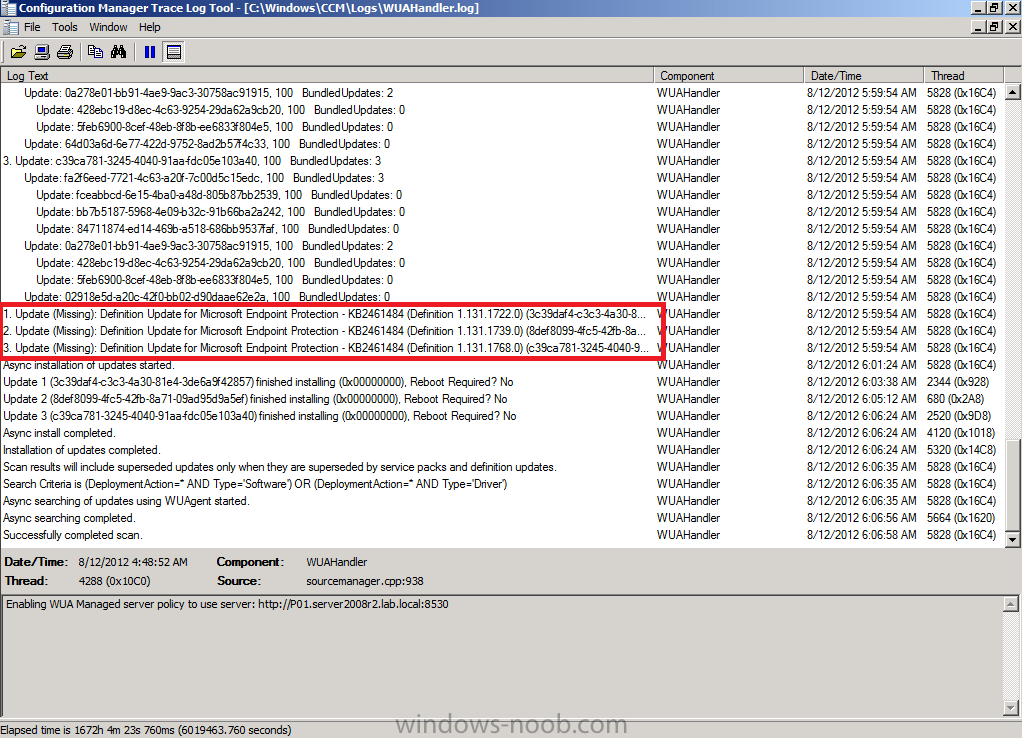
As a final note, review the WUAHandler.log on the computer in question to see that it is indeed checking for the Endpoint Protection definition updates, as per the screenshot below.